How to fit an ATE or Girling Porsche 944 brake booster to an e30

One of the problems with swapping in a modern 24 valve power plant into the e30 chassis is that the factory brake booster will not clear the intake manifold on BMW M5x/S5x engines. Several options are available to remedy this, including slotting or redrilling the firewall to move the factory booster over, running no booster at all, and retrofitting a dual chamber BMW booster from an e32. However, the Porsche booster is among the most attractive options because it yields reasonable brake assist with no change of binding, and it works with the existing e30 master cylinder. The 944 boosters are easy to find in your local junkyard or scrapyard making this an economical option.

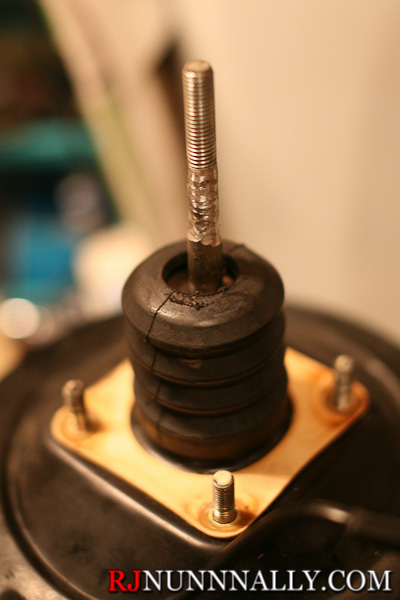
The first thing you need to know about this retrofit is that 944 boosters come in two flavors – one version is produced by ATE and the second by Girling. The BMW clevis must be threaded onto a 10×1.5mm threaded rod; unfortunately the Girling rod is 12mm, meaning the thread must be ground down to approximately 10mm before threading while the ATE comes from the factory in a 10mm diameter, making the ATE booster a more attractive option. Once this minor, and I do stress minor, issue is resolved, the Porsche booster is a direct swap onto the e30 chassis. Here’s my how-to guide!

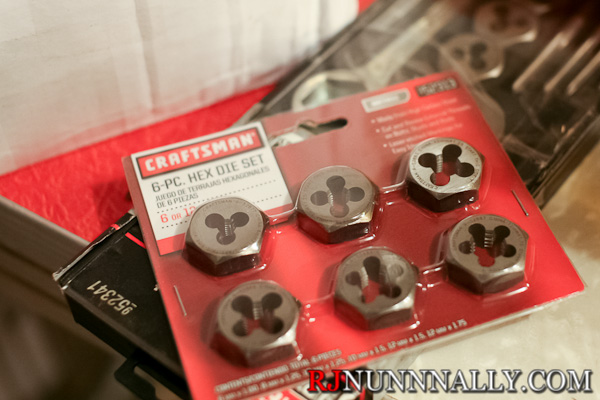
Before you get started, you’ll need a 10×1.5mm die. I got mine in a set from sears for $14.99 and it worked great. Note the sears’ die will need the wrench too which is not included with the die set – you’ll either need to buy it seperately or get the whole tap & die kit. I already had a standard tap and die set with the wrench so I opted to get the metric die set only. (Interesting side note – the old tap & die set underneath was made in the USA while my new die set was made in china )Craftsman metric die set


A die like this should do the trick if you won’t use a set.


Champion ST-10×1.5mm Speedthreader M10 by 1.5mm HSS Die Permanently Integrated In Handle With Self-Centering Guide


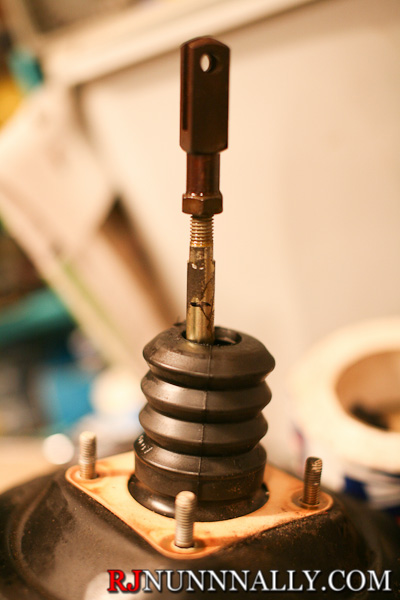
Here’s a freshly pulled 944 booster with the funky extension installed. It’s held on by four 13mm nuts. Remove these and save them for later.Porsche 944 brake booster extension

I measured where the jam nut was at on the e30 and transferred the measurement to the 944 booster. This lets you know how far down the rod needs to be ground and threaded.

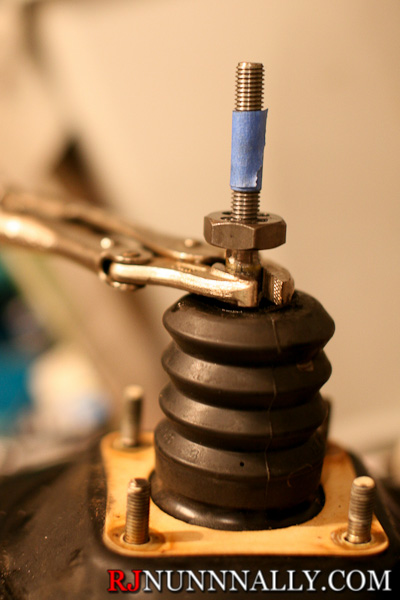
Porsche brake booster rod with clevis


Now you’ll need to remove the 944 clevis and jam nut. I found it impossible to remove by holding the rod with a 10mm wrench. Instead, I inserted a bolt through the clevis, held the bolt with the vice, and loosened the jam nut with an adjustable wrench. [no pics]

***If you have an ATE booster, you can skip the grinding section***

After this is done, it is time to grind down the rod. A bench grinder will do fine, but I clamped an angle grinder into a vice as I thought it was easier to work with. I clamped a pair of vice grips below where I was grinding and used them to turn the shaft while grinding.Angle grinder clamped in a vice

Ground down. It turns out this doesn’t need to be perfect as the die will clean it up. Just get it near 10mm and err on the larger side; the die will cut through a little excess material.Porsche brake booster rod ground down
***ATE Boosters skip to here***

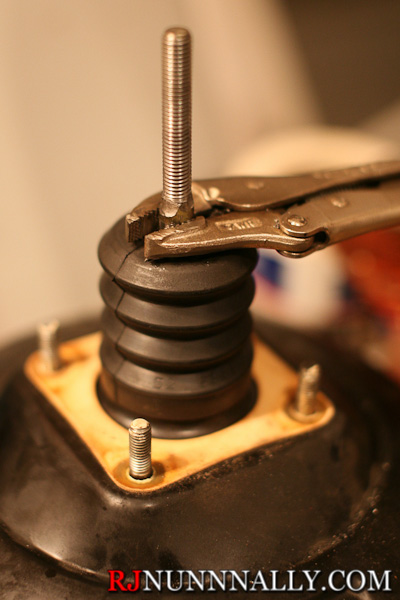
Now it’s time to thread the rod. I again used a pair of vice grips clamped below the jam nut mark. These need to be clamped very securely to prevent the rod from spinning. It will take some ingenuity to prevent the vice grips from spinning, but I clamped the end of the vice grips in the vice which worked fine. Once the rod is secured, thread the 10×1.5mm die onto the existing threads, then continue to thread the die down the rod until it goes just past the jam nut mark. run it up and down the rod a few times until it moves freely, then run it down the rod until it sits at the mark and leave it there for the next step. Threading will require some effort.

cutting threads in Porsche brake booster

The result – I took the die off for the pic, but leave it on for the next step.

Finished threads Porsche brake booster

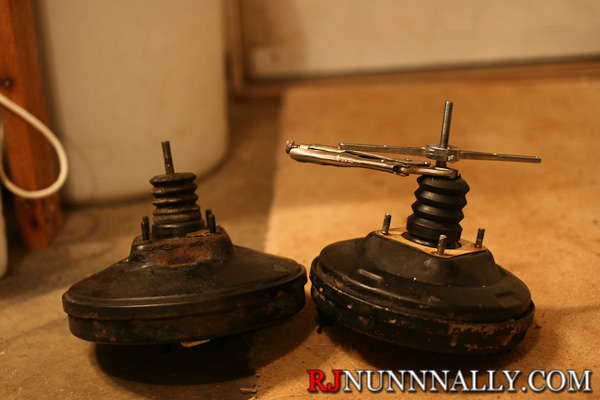
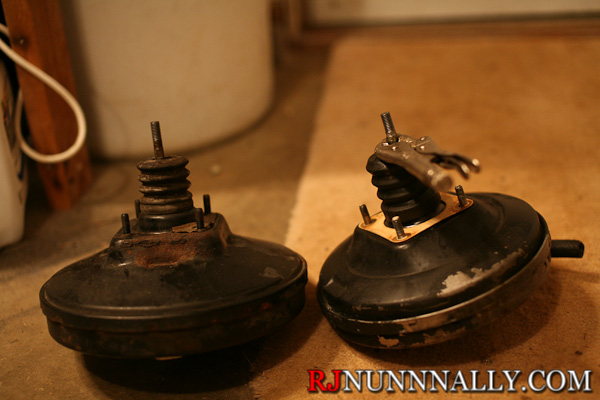
Compared to the stock booster (on left). Notice how much longer the rod is on the 944 booster. This will need to be cut down. Measure the stock booster’s rod length and transfer it to the 944’s rod. I used masking tape as sharpie was hard to see.

Porsche and BMW e30 boosters

the bottom of the masking tape is the cut line. Cut it with an angle grinder or hacksaw. After the cut is finished, take the die off to clean up the threads.

Cutting Porsche brake booster rod to length

that looks good!

Porsche and BMW e30 brake booster comparison

it’s all ready to go back on the car! Use the four nuts you saved earlier to bolt it up. [installed pic coming]

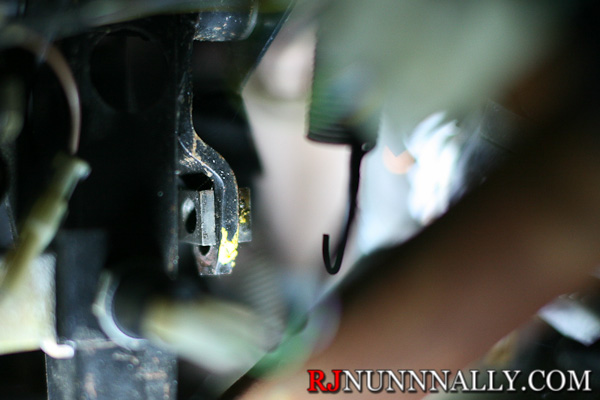
Wow, perfect fit the very first time!!! Seriously, that’s what I found when I went under the dash. It literally could not have been any better.

Under the e30 dash

After this swap is complete, you can expect to have power brakes for your 24 valve swap. Assist is less than the factory booster provides, but still adequate to stop the car well. I can lock the brakes up on my factory non-ABS equipped ’85 in a heart beat. I’ve heard some criticism to the effect of the brakes being too hard, but I’m a small guy and don’t have a problem 😀

BMW e39 LKM / LCM (Light Computer) Replacement

One night I was grabbing a drink from the kitchen when I noticed blinking amber lights from the driveway. I thought my alarm had gone off so I tried to unset it to no avail. I walk out to the car to find all the parking lights on, the taillights on, the hazards blinking away, and the instrument cluster lit up with the message “Lights On.” After pressing the hazard button, turning the car on/off, and of course trying to the light switch, I started pulling fuses Unfortunately, that didn’t quite do the trick and I had to disconnect the battery. Obviously something is messed up. My first guess? LCM.

My car is a 6/96 build 540i. That means that it is equipped with an early LCM, the LCM II; the LCM III and IV will interchange, so this Monday I came into possession of an LCM III from an ’01 X5. Time to find out what happens tonight!

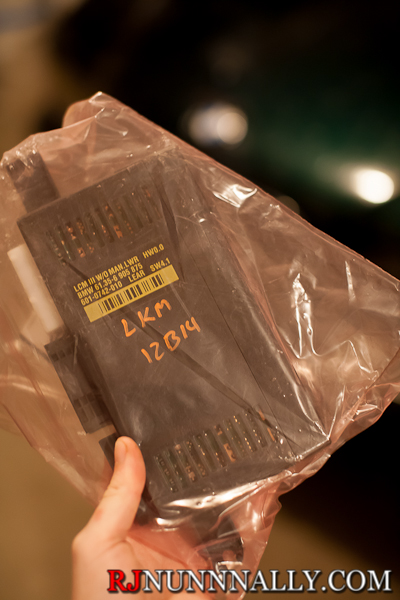
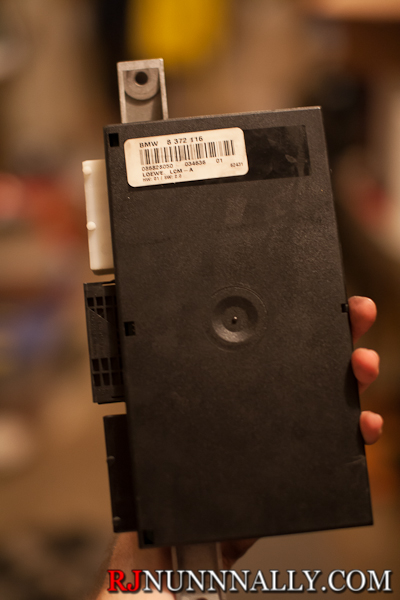
Lights on and blinking. Side note, I really need to dehaze my headlights.E39 Lights FlashingHere you can see the gauge lights are on, but the light switch is off (you can also see the turn signals are on). That ain’t right!Gauge lights onTo repair an LCM fault on a 1996-2003 e39 528i, 530i, 540i, or M5, you will need a new or used LCM that is the same or newer than the unit you are replacing. Here I have an LCM/LKM from a 2001 X5.

Used LCM III


To physically replace the LCM/LKM, the following tools are needed:

  • 8mm ratchet
  • (optional) PA Soft 1.4.0 cable & software
    • OBD-2 (16 pin) to 20 pin BMW Diagnostic Port adapter, required for PA Soft on cars that have the 20 pin Diagnostic Port

Really, It’s a simple job. Just follow these simple steps:

  • Disconnect battery
  • Remove the passenger side kick panel, under the glovebox and on the right.
  • Remove glove box under panel, pull it straight forward. It takes some force to unclip.
  • Look to the right, you can see the LCM. Move sound deadening out of the way.
  • Using 8mm ratchet, remove the single 8mm bolt holding the LCM in place.
  • Slide LCM down and rotate out
  • Unplug electrical connectors

Assembly is the reverse.

On a scale of 10, this is a 2/10 job, it is super easy once you orient yourself.

Without coding, my lights more or less work correctly. As the LCM I bought is from an X5, I didn’t expect everything to be fully functional. My interior lights, headlights, and brake lights work as normal. My taillights light up the outside bulb, but not the inside (there are normally two lit), but they work well enough for now. The turn signals do not work at all, but curiously the hazards do. The high beams also do not work. It turns out that early and late model (including X5) cars have different hiring for the turn signal stalk. Coding fixes this.

To go with the above instructions, here are pictures of my repair process:

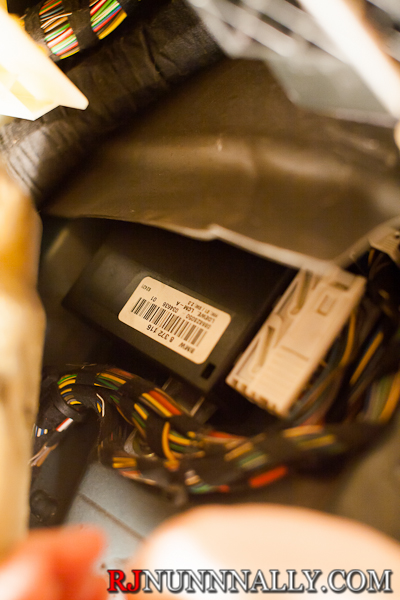
Old LCM in its home

Old LCM


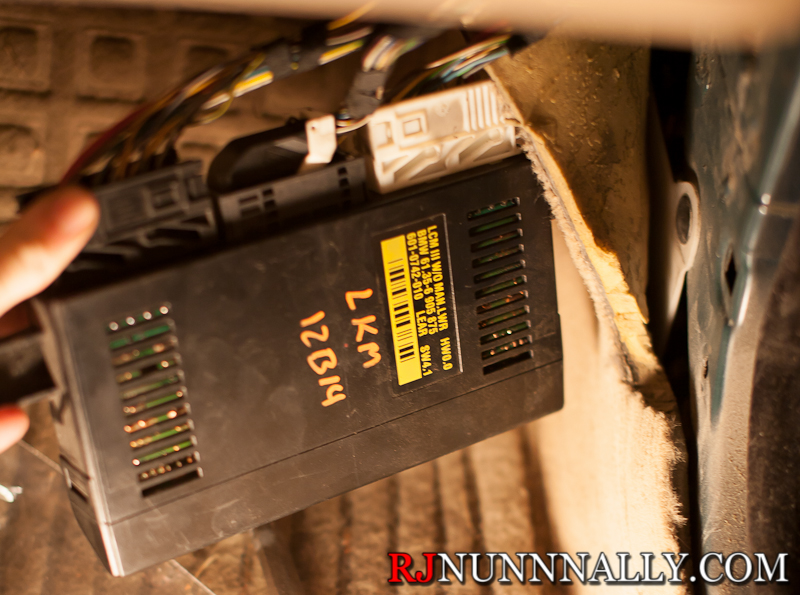
New LCM plugged in, but not yet secured

New LCM I

Another shot

New LCM II

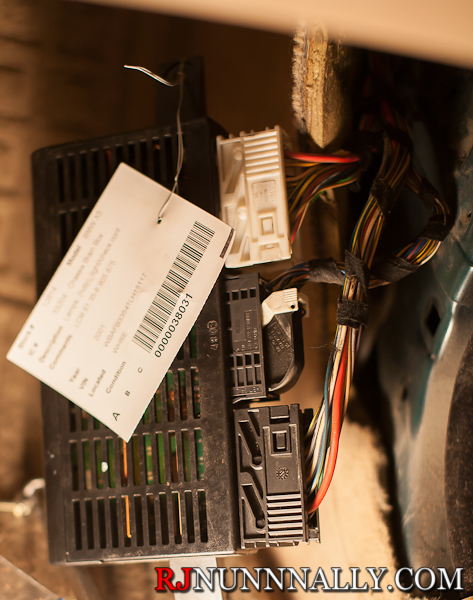
And the old LCM out of the car

Old LCM Out

I pulled the old LCM apart to see what went wrong – it looks mine experienced some water damage. Look at the green corrosion on the chip.

LCM Corrosion

Coding is a two step process and requires two different cables – one for PA Soft 1.4 (BMW Scanner) and one for INPA/NCS Expert/DIS/SSS Progman/WinFKP/EDIABAS. I purchased both of mine on eBay. The appropriate software must then be obtained. I used this one from Amazon. I tried to buy from US based sellers and the cables each came in 3 days while the Amazon cable came in two via prime.

For step one of the coding, use PA Soft to set the mileage on the LCM to “0” and the VIN to match your car. This is required for used LCMs because DIS will only code “new” LCMs – or LCMs with the mileage set to 0. This will also allow the car to overwrite the mileage in the LCM and avoid an odometer tamper light. If you are using an LCM from the same age e39, no additional coding may be necessary.

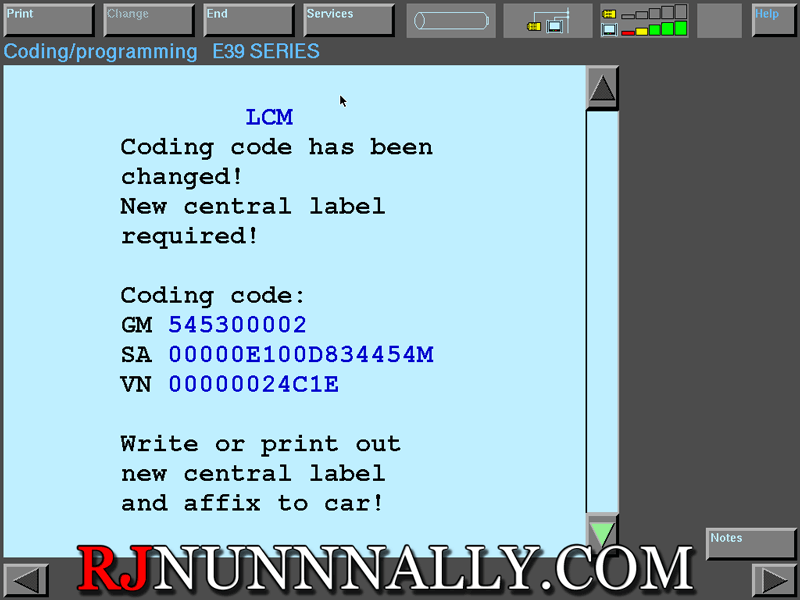
For me, I needed to reprogram the LCM to work with my car since it came from an X5. I coded my car with DIS and it is VERY easy. With DIS started, I selected “coding/program”, then “ZCS/FA coding”, “e39 series”, “recoding” , and finally “LCM.” It then works its magic!

All done!

program_lcm


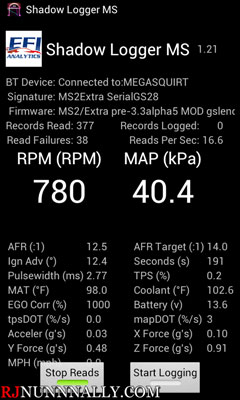
EFI Analytics’ Shadow Logger MS

Shadow Logger MS Screen Capture

As the weather warms up, I’ve been starting to drive the ’85 Turbo E30 more. In the “old” days, it was necessary to drag a laptop around to log the MegaSquirt ECU, but thanks to Phil Tobin’s Shadow Logger MS app for Android, it is now possible to connect to the MegaSquirt with your phone! Not only does it log every variable available on the MS, it also adds GPS integration. There is a catch though – your MS must have a bluetooth dongle added to it. I purchased mine on ebay for less than $20 and programmed it to work with the MS. Phil also sells a ready to roll dongle on his site.

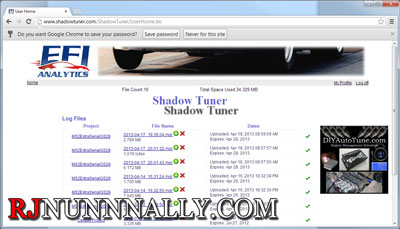
Shadow Tuner


After you’re done logging, Shadow Logger can upload the log to EFI Analytics’ website so that you can review the log on your desktop computer. Did I mention this is all FREE? Shadow Logger uses a new, compressed log format so it cannot directly be read by MegaLogViewer, but the website does all the necessary processing for you. Upload your current TunerStudio tune and Shadow Tuner will convert the log to a MegaLogViewer MSL file automatically.

shadow_tuner2


Just press the green download icon and open the file in MegaLogViewer to see the log! Please support Phil and register MegaLogViewer – it’s a great product. Registering also unlocks calculated fields, scatter plots, and a fully functional very of VE Analyze.

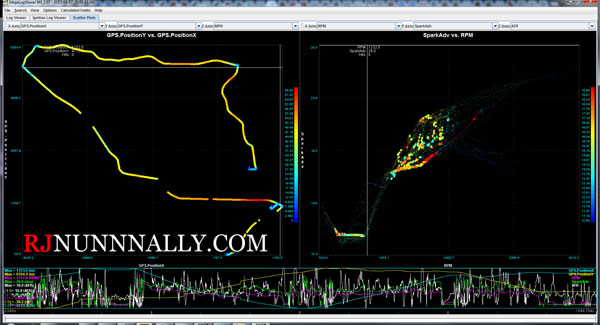
MegaLogViewer Scatter Plot


This is a demo of the scatter plot functionality. Here I have the left side set to GPS X & Y coordinates with it color coded by vehicle speed. On the right, I plotted Spark Advance vs Engine Speed, color coded by Air/Fuel Ratio. Scatter plots are an easy way to visualize data and find trends that might otherwise be hard to see.