How to Vinyl Dye Your Parcel Shelf

I picked up a (formerly) black parcel shelf complete with premium rear speakers for my e30 at the junkyard. Here’s how I renewed this parcel shelf with some vinyl dye and sweat.

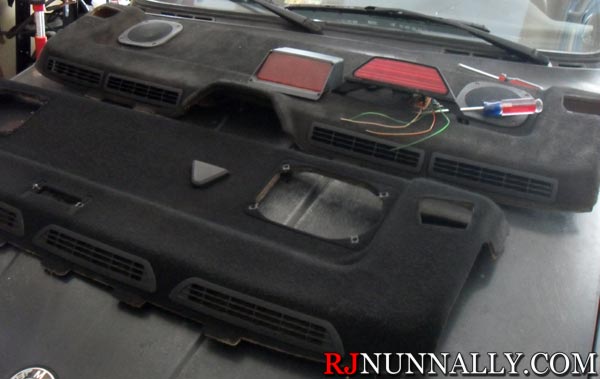
First, meet my parcel shelf, complete with plenty of dog(?) hair.

Original Parcel Shelf

Next, you need to prep it for dye. This involves removing all the accessories, like the speakers, third brake light, vents, and seat belt trim. If your’s has a hair problem like mine, a lint roller will do wonders to clean it up. Remember – the key to a good final product is in the preparation!

Prepped Parcel Shelf

All prepped!


DuplicolorNow, get yourself a couple cans of vinyl dye. I used Duplicolor as seen here. One can will probably get the job done, but pick up two to be safe. Spray many light, consistent coats in many directions to get full coverage. Vinyl dye is more forgiving than spray paint, but if you go heavy in one place – well, you’ll need to go heavy everywhere for it to look right! You will be fine just spraying dye on the parcel shelf, but for carpet or other “deep” fabric, the dye will need to be brushed into the fabric for full coverage. Once you get one good coat, let it dry for 15-30 minutes, then hit it again. I went with at least three coats to achieve my final finish. Again, vinyl dye is forgiving – it doesn’t really run and just gets absorbed into the material, but heavy applications will make cloth materials feel stiff.


Here’s my first coat

First Coat


And eventually you’ll end up here, the bottom result. The top was dyed by my friend and requires more coverage. On the plus side, it’s been exposed to constant sun for over a year and has not faded!

Final Product

LED Tag Lights

One of the tag lights was out on my e30 making for a good mod opportunity. I figured LED lighting would help update the look of car, so I ordered these guys from Amazon.

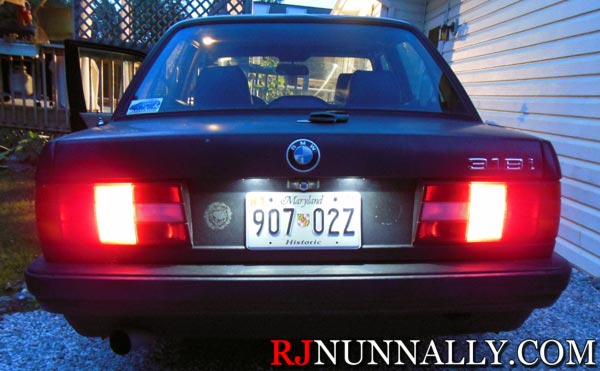
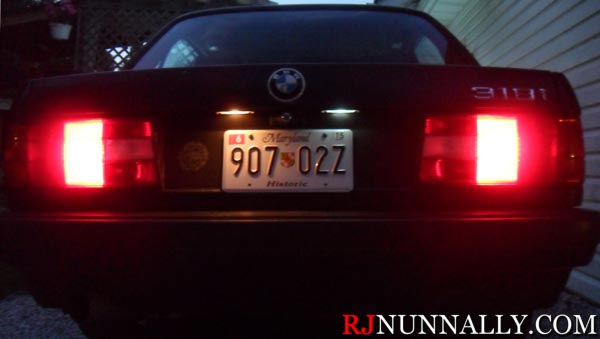
E30 Rear at Dusk

E30 rear at dusk with LED tag lights

They look good to me! I know the camera doesn’t do the best job, but just compare the license plate white to the yellow light given off by the incandescent lights in the background!

New LEDs!

New LED lights on the left, comparison of the original halogen light vs an LED light right

Installation is a snap too. Just find your tag lights, remove the screws (hopefully they’re not as rusty as mine!), pop the light out, replace the old halogen lights with the LED replacements, and reinstall. Be sure to test the LEDs prior to reinstallation – direction matters. Also be sure to orient the LED facing down.

Install Process


Here’s a quick comparison of new vs old:

Old halogen light (left) vs new LED light (right)

Old halogen light (left) vs new LED light (right)

Note: The LED rotated in its socket as I installed it for this shot. The new LEDs are actually much brighter (as seen in the opening shot).

BMW M50 Power Steering Delete Belt

My e30s both have their power steering deleted, but the M50 from the later e36 uses a serpentine belt that drives the water pump, alternator, and p/s pump all at the same time making impossible to “just remove the belt” to prevent the p/s pump from running like on the old M20 or the early M42. However, there is a solution – by completely unbolting and removing the p/s pump from the M50 a different, shorter serpentine belt can used with an alternate routing to effectively delete the power steering. You should not run the p/s pump without fluid. Different part numbers are thrown around, generally ranging from a 6PK1400 to a 6PK1415, with 6PK1410 in the middle. Let me decode those numbers – the first “6” means the belt is a 6 rib serpentine belt and basically determines the width. This stays constant. The last four numbers are the belt length in millimeters, making a 6PK1400 belt 1400mm long. That’s simple enough.

I kept my idler pulley (the one above the alternator) and successfully fitted a 6PK1420 Serpentine Belt from Advance Auto (Part # 560K6). This belt, as mentioned above, makes it 1420mm in length. It was a snug fit, but not quite as tight as the factory belt, so I’m sure a 6PK1415 could also be used. Some people elect to delete the idler too and use a shorter belt; I would recommend keeping the idler as it gives the belt more grip on the alternator & water pump.

Fitting an ATE Porsche 944 Brake Booster to an E30 BMW Part II

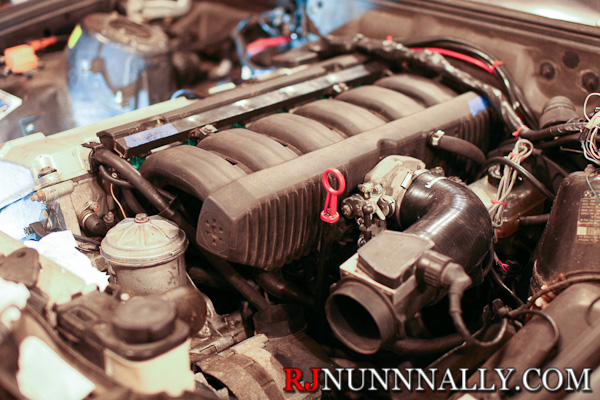
My ’91 BMW 318i e30 arrived with a partially completed 24 valve M50 swap. One of the problems with the 24 valve motors is that the intake manifold does not clear the factory brake booster which leaves about three common options:

  1. (Re)Drill or slot the firewall to move the factory brake booster over about 3/4″. This is not recommended as the linkage can bind.
  2. Fit an e30 325iX or e32 735i “double” brake booster (they’re basically the same) and use the appropriate master cylinder. This option is supposed to provide additional brake assist and the booster does not need to be modified. However, the booster is a good deal deeper which requires that the brake lines be bent to fit and it requires that a remote mount fluid reservoir be used so that the master cylinder will clear the throttle body.
  3. Fit a Porsche 944 brake booster and use the factory master cylinder. Of course, the booster needs to be modified to fit the e30 and the degree of modification varies depending on if the booster was made by Girling or ATE. I already covered the Girling booster here.

The previous owner of the ’91 opted for option two, and indeed an e32 brake booster & master cylinder were mounted in the engine bay.  I did not like this setup to begin with as the booster rubbed against my throttle cable & caused it to bind. Additionally, the master cylinder sat so close to the throttle body that it made it hard to work on the engine and the remote reservoir give the engine bay a clean, factory appearance in my opinion. The straw (or two ton weight as it were) that broke the camel’s back came when I fired the engine up; I had a massive vacuum leak that turned out to be the brake booster itself. Rather than replace the e32 booster with another e32 booster, I opted to buy a factory ’91 318i master cylinder and reservoir, and a “low miles” 944 booster.

E30 ATE 944 Booster

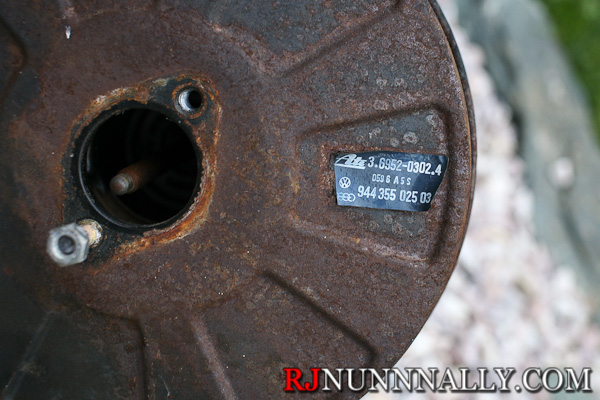
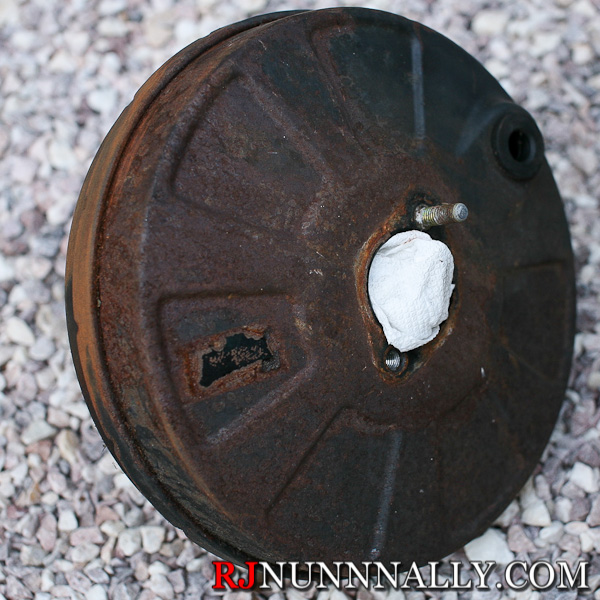
Rusty ATE Porsche 944 Brake Booster

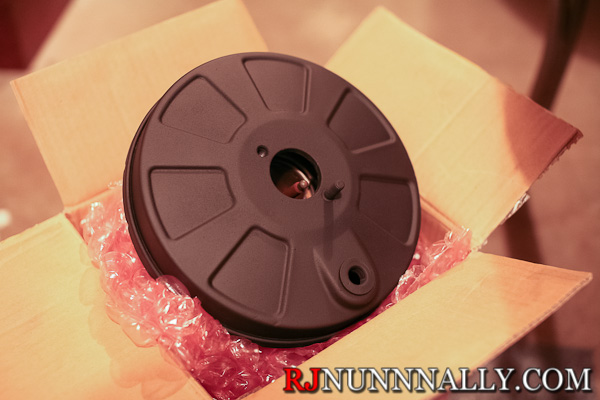
 I was in a time crunch so I purchased this booster on an enthusiast forum rather than pull
it myself. The seller did not post pictures, but informed me that the booster held a good vacuum and actually came out of a 944 with “85k miles.” Sound good! Imagine my surprise when this rusty thing showed up, complete with a missing stud.

e30 Ate 944 booster

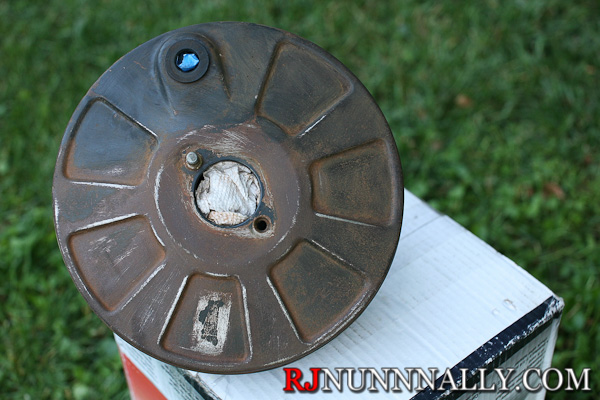
No matter, I’ll clean it up. First step – remove the barely attached sticker and protect the inside of the booster from debris. Next step – wire brush, then sand, all the loose rust off!

Prepped Porsche 944 booster

Prepped Porsche 944 booster

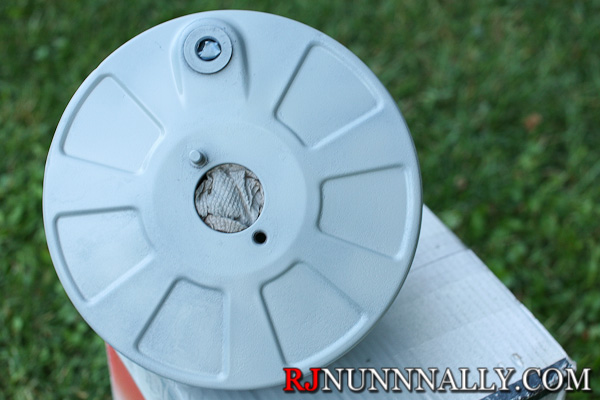
Then add a couple coats of primer. This is just cheap 97 cents-a-can primer from walmart.

944 booster wearing a fresh coat of primer

944 booster wearing a fresh coat of primer

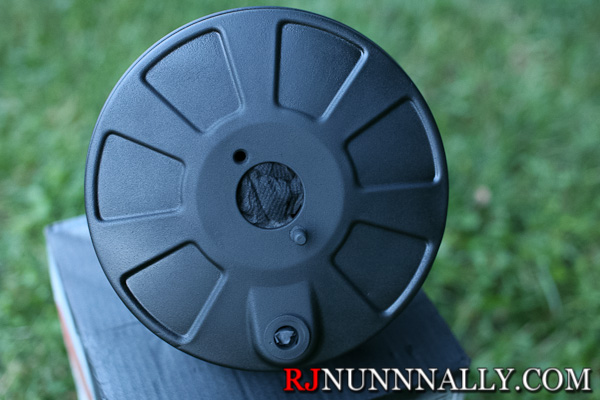
Follow up with real paint. I used Rust-Oleum Satin Enamels Black that is supposed to help prevent rust. Truthfully, I used what was around the house but I’m very impressed with how the paint turned out!

First coat of black paint!

Second coat of black paint, still wet!

And here’s the finished product. I think it came out great! And I was even in a rush – it was getting late and rain was coming in the next day, meaning that this booster was slated to be installed before I’d have another chance to paint.

Final paint on the 944 booster

Final paint on the 944 booster

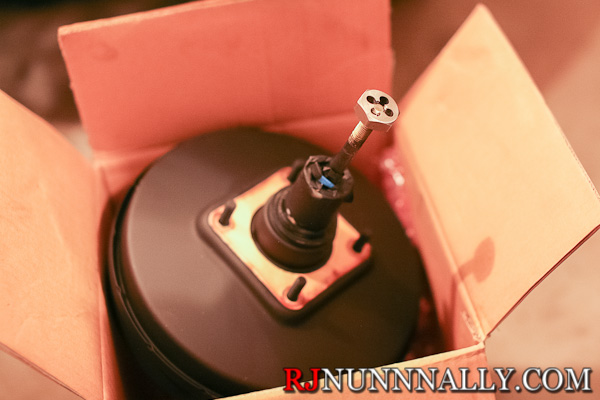
Now that the booster looked respectable, some more work had to be done before fitting it to the e30. On the ATE, the modifications are simple – extend the 10×1.5mm threads (using a die like this) and chop off the excess rod so that it matches the factory e30 booster. Also remove that bowl Porsche bolts on their boosters – it’s not needed on the e30.

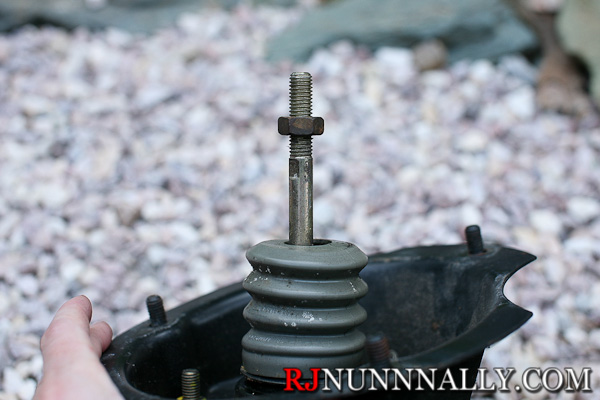
Here’s the factory threads on the ATE booster. Note that the rod is smaller in diameter than the Girling version.

Factory ATE 944 booster threads

Factory ATE 944 booster threads

The threads need to be extended to near the boot.

Threading on the die

Threading on the die

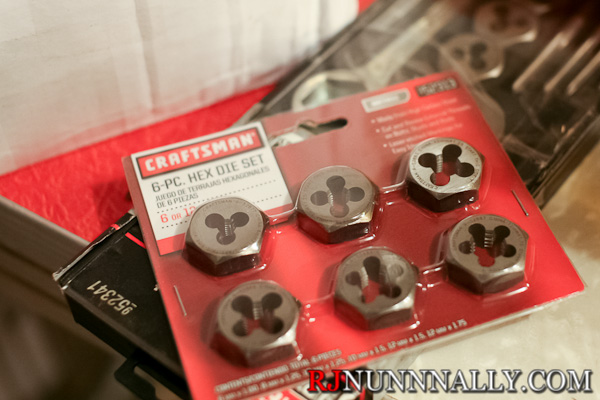
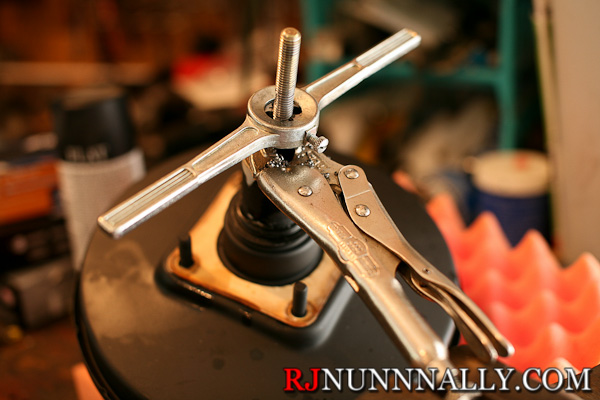
I use a Craftsman die that requires a tap & die to use. If you already have the handle, you can save money buy buying this 10×1.5mm die instead. Make sure to use some sort of lubricant, like automatic transmission fluid (ATF), and run the die down the threads.

Threading the 944 booster

Threading the 944 booster

I use Vise Grips with the end in a vise to the hold the booster’s rod in place. You do not want to turn the rod on the booster a lot as it can rip the internal diaphragm and destroy the booster. After you are done threading, measure the factory e30 booster rod, transfer the measurement to the 944 booster rod, and cut the rod to length using a hacksaw or angle grinder. You are now ready to transfer over the e30 clevis & install the booster!

Installed 944 booster!

Installed 944 booster!

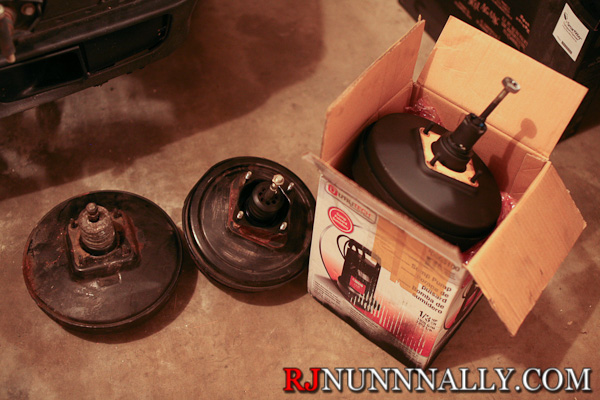
And there’s my installed 944 booster. Finally, I leave you with a shot of all three boosters.

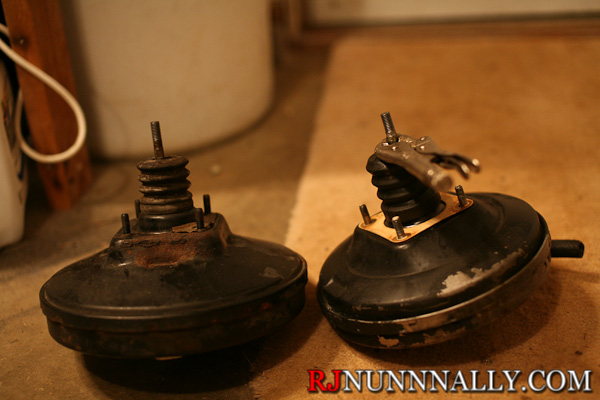
e30, e32, and 944 boosters

e30, e32, and 944 boosters

From left to right – factory 1985 325e brake booster, e32 735i brake “double” brake booster, and the Porsche 944 ATE brake booster.

How to fit an ATE or Girling Porsche 944 brake booster to an e30

One of the problems with swapping in a modern 24 valve power plant into the e30 chassis is that the factory brake booster will not clear the intake manifold on BMW M5x/S5x engines. Several options are available to remedy this, including slotting or redrilling the firewall to move the factory booster over, running no booster at all, and retrofitting a dual chamber BMW booster from an e32. However, the Porsche booster is among the most attractive options because it yields reasonable brake assist with no change of binding, and it works with the existing e30 master cylinder. The 944 boosters are easy to find in your local junkyard or scrapyard making this an economical option.

The first thing you need to know about this retrofit is that 944 boosters come in two flavors – one version is produced by ATE and the second by Girling. The BMW clevis must be threaded onto a 10×1.5mm threaded rod; unfortunately the Girling rod is 12mm, meaning the thread must be ground down to approximately 10mm before threading while the ATE comes from the factory in a 10mm diameter, making the ATE booster a more attractive option. Once this minor, and I do stress minor, issue is resolved, the Porsche booster is a direct swap onto the e30 chassis. Here’s my how-to guide!

Before you get started, you’ll need a 10×1.5mm die. I got mine in a set from sears for $14.99 and it worked great. Note the sears’ die will need the wrench too which is not included with the die set – you’ll either need to buy it seperately or get the whole tap & die kit. I already had a standard tap and die set with the wrench so I opted to get the metric die set only. (Interesting side note – the old tap & die set underneath was made in the USA while my new die set was made in china )Craftsman metric die set


A die like this should do the trick if you won’t use a set.


Champion ST-10×1.5mm Speedthreader M10 by 1.5mm HSS Die Permanently Integrated In Handle With Self-Centering Guide


Here’s a freshly pulled 944 booster with the funky extension installed. It’s held on by four 13mm nuts. Remove these and save them for later.Porsche 944 brake booster extension

I measured where the jam nut was at on the e30 and transferred the measurement to the 944 booster. This lets you know how far down the rod needs to be ground and threaded.
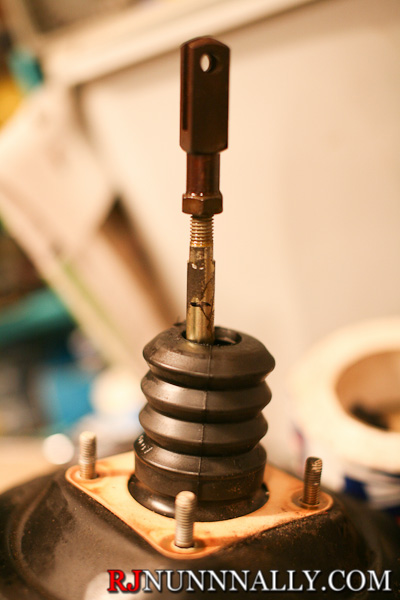
Porsche brake booster rod with clevis


Now you’ll need to remove the 944 clevis and jam nut. I found it impossible to remove by holding the rod with a 10mm wrench. Instead, I inserted a bolt through the clevis, held the bolt with the vice, and loosened the jam nut with an adjustable wrench. [no pics]

***If you have an ATE booster, you can skip the grinding section***

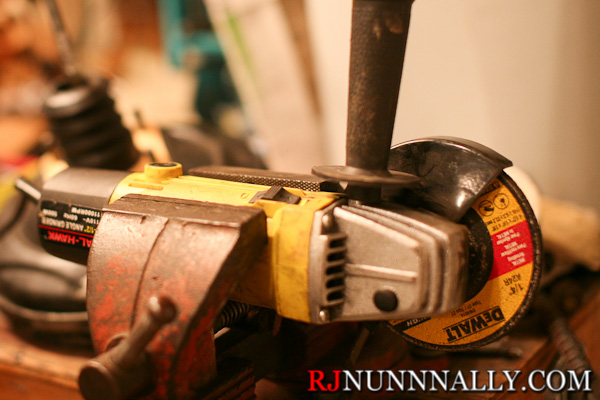
After this is done, it is time to grind down the rod. A bench grinder will do fine, but I clamped an angle grinder into a vice as I thought it was easier to work with. I clamped a pair of vice grips below where I was grinding and used them to turn the shaft while grinding.Angle grinder clamped in a vice
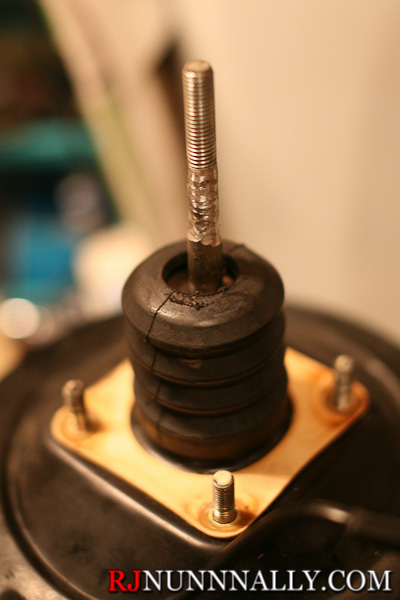
Ground down. It turns out this doesn’t need to be perfect as the die will clean it up. Just get it near 10mm and err on the larger side; the die will cut through a little excess material.Porsche brake booster rod ground down
***ATE Boosters skip to here***

Now it’s time to thread the rod. I again used a pair of vice grips clamped below the jam nut mark. These need to be clamped very securely to prevent the rod from spinning. It will take some ingenuity to prevent the vice grips from spinning, but I clamped the end of the vice grips in the vice which worked fine. Once the rod is secured, thread the 10×1.5mm die onto the existing threads, then continue to thread the die down the rod until it goes just past the jam nut mark. run it up and down the rod a few times until it moves freely, then run it down the rod until it sits at the mark and leave it there for the next step. Threading will require some effort.
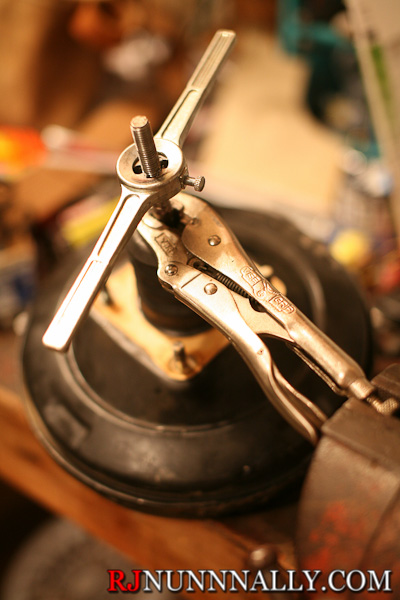
cutting threads in Porsche brake booster

The result – I took the die off for the pic, but leave it on for the next step.
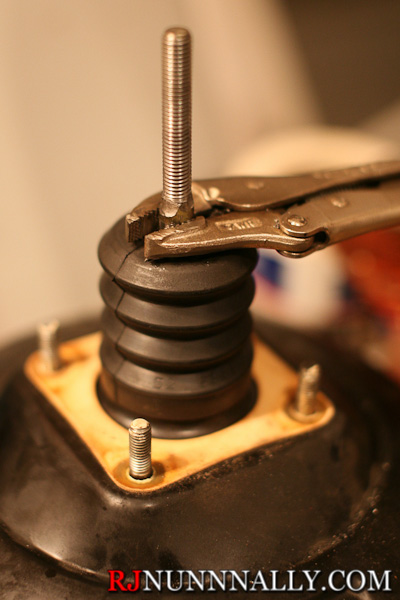
Finished threads Porsche brake booster

Compared to the stock booster (on left). Notice how much longer the rod is on the 944 booster. This will need to be cut down. Measure the stock booster’s rod length and transfer it to the 944’s rod. I used masking tape as sharpie was hard to see.
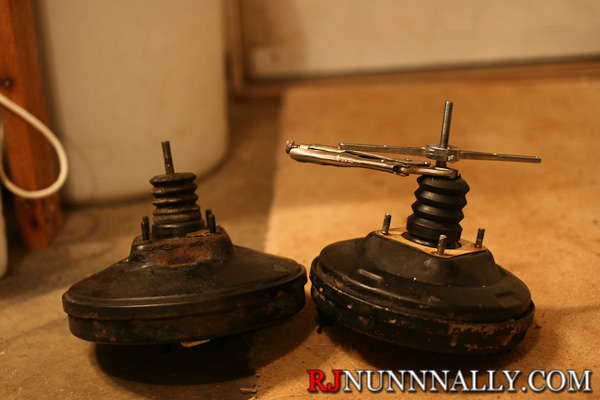
Porsche and BMW e30 boosters

the bottom of the masking tape is the cut line. Cut it with an angle grinder or hacksaw. After the cut is finished, take the die off to clean up the threads.
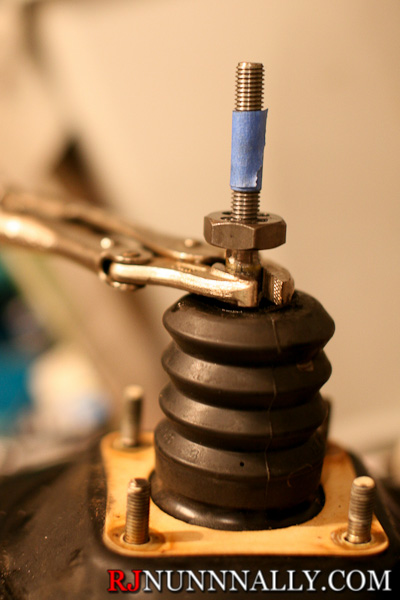
Cutting Porsche brake booster rod to length

that looks good!

Porsche and BMW e30 brake booster comparison

it’s all ready to go back on the car! Use the four nuts you saved earlier to bolt it up. [installed pic coming]

Wow, perfect fit the very first time!!! Seriously, that’s what I found when I went under the dash. It literally could not have been any better.
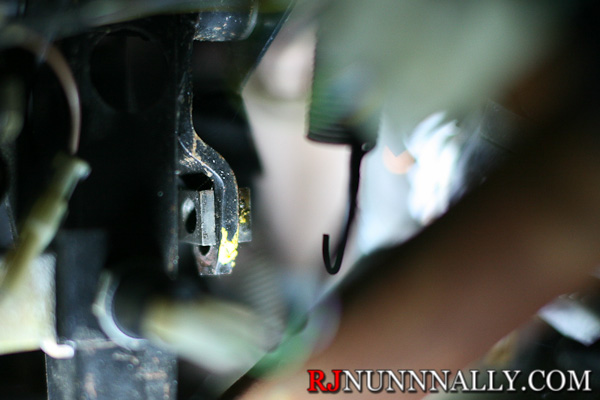
Under the e30 dash

After this swap is complete, you can expect to have power brakes for your 24 valve swap. Assist is less than the factory booster provides, but still adequate to stop the car well. I can lock the brakes up on my factory non-ABS equipped ’85 in a heart beat. I’ve heard some criticism to the effect of the brakes being too hard, but I’m a small guy and don’t have a problem 😀